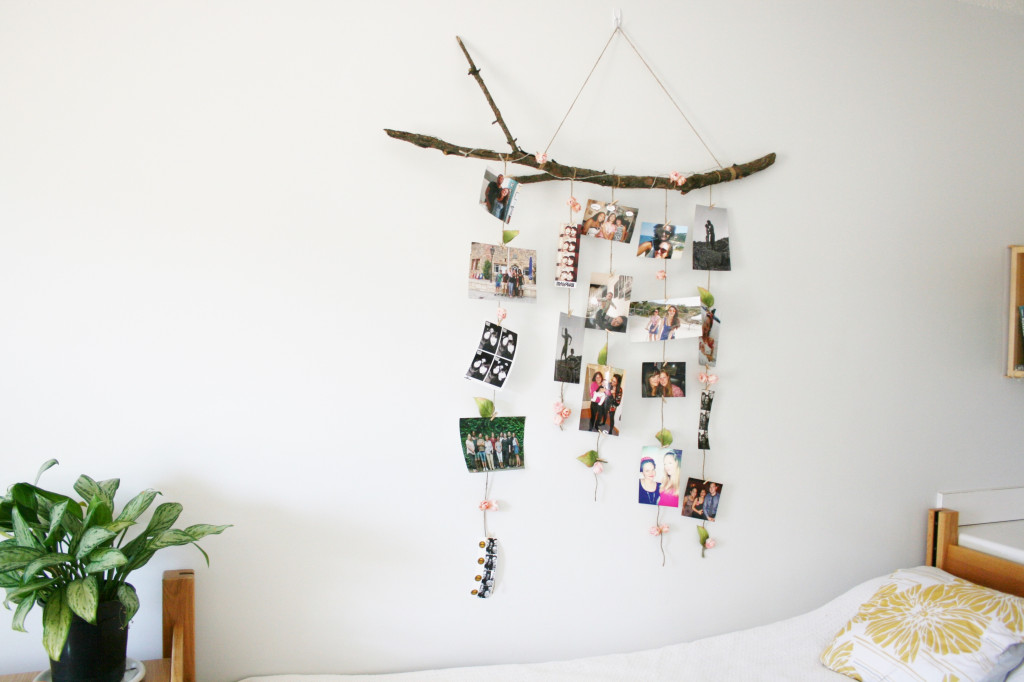
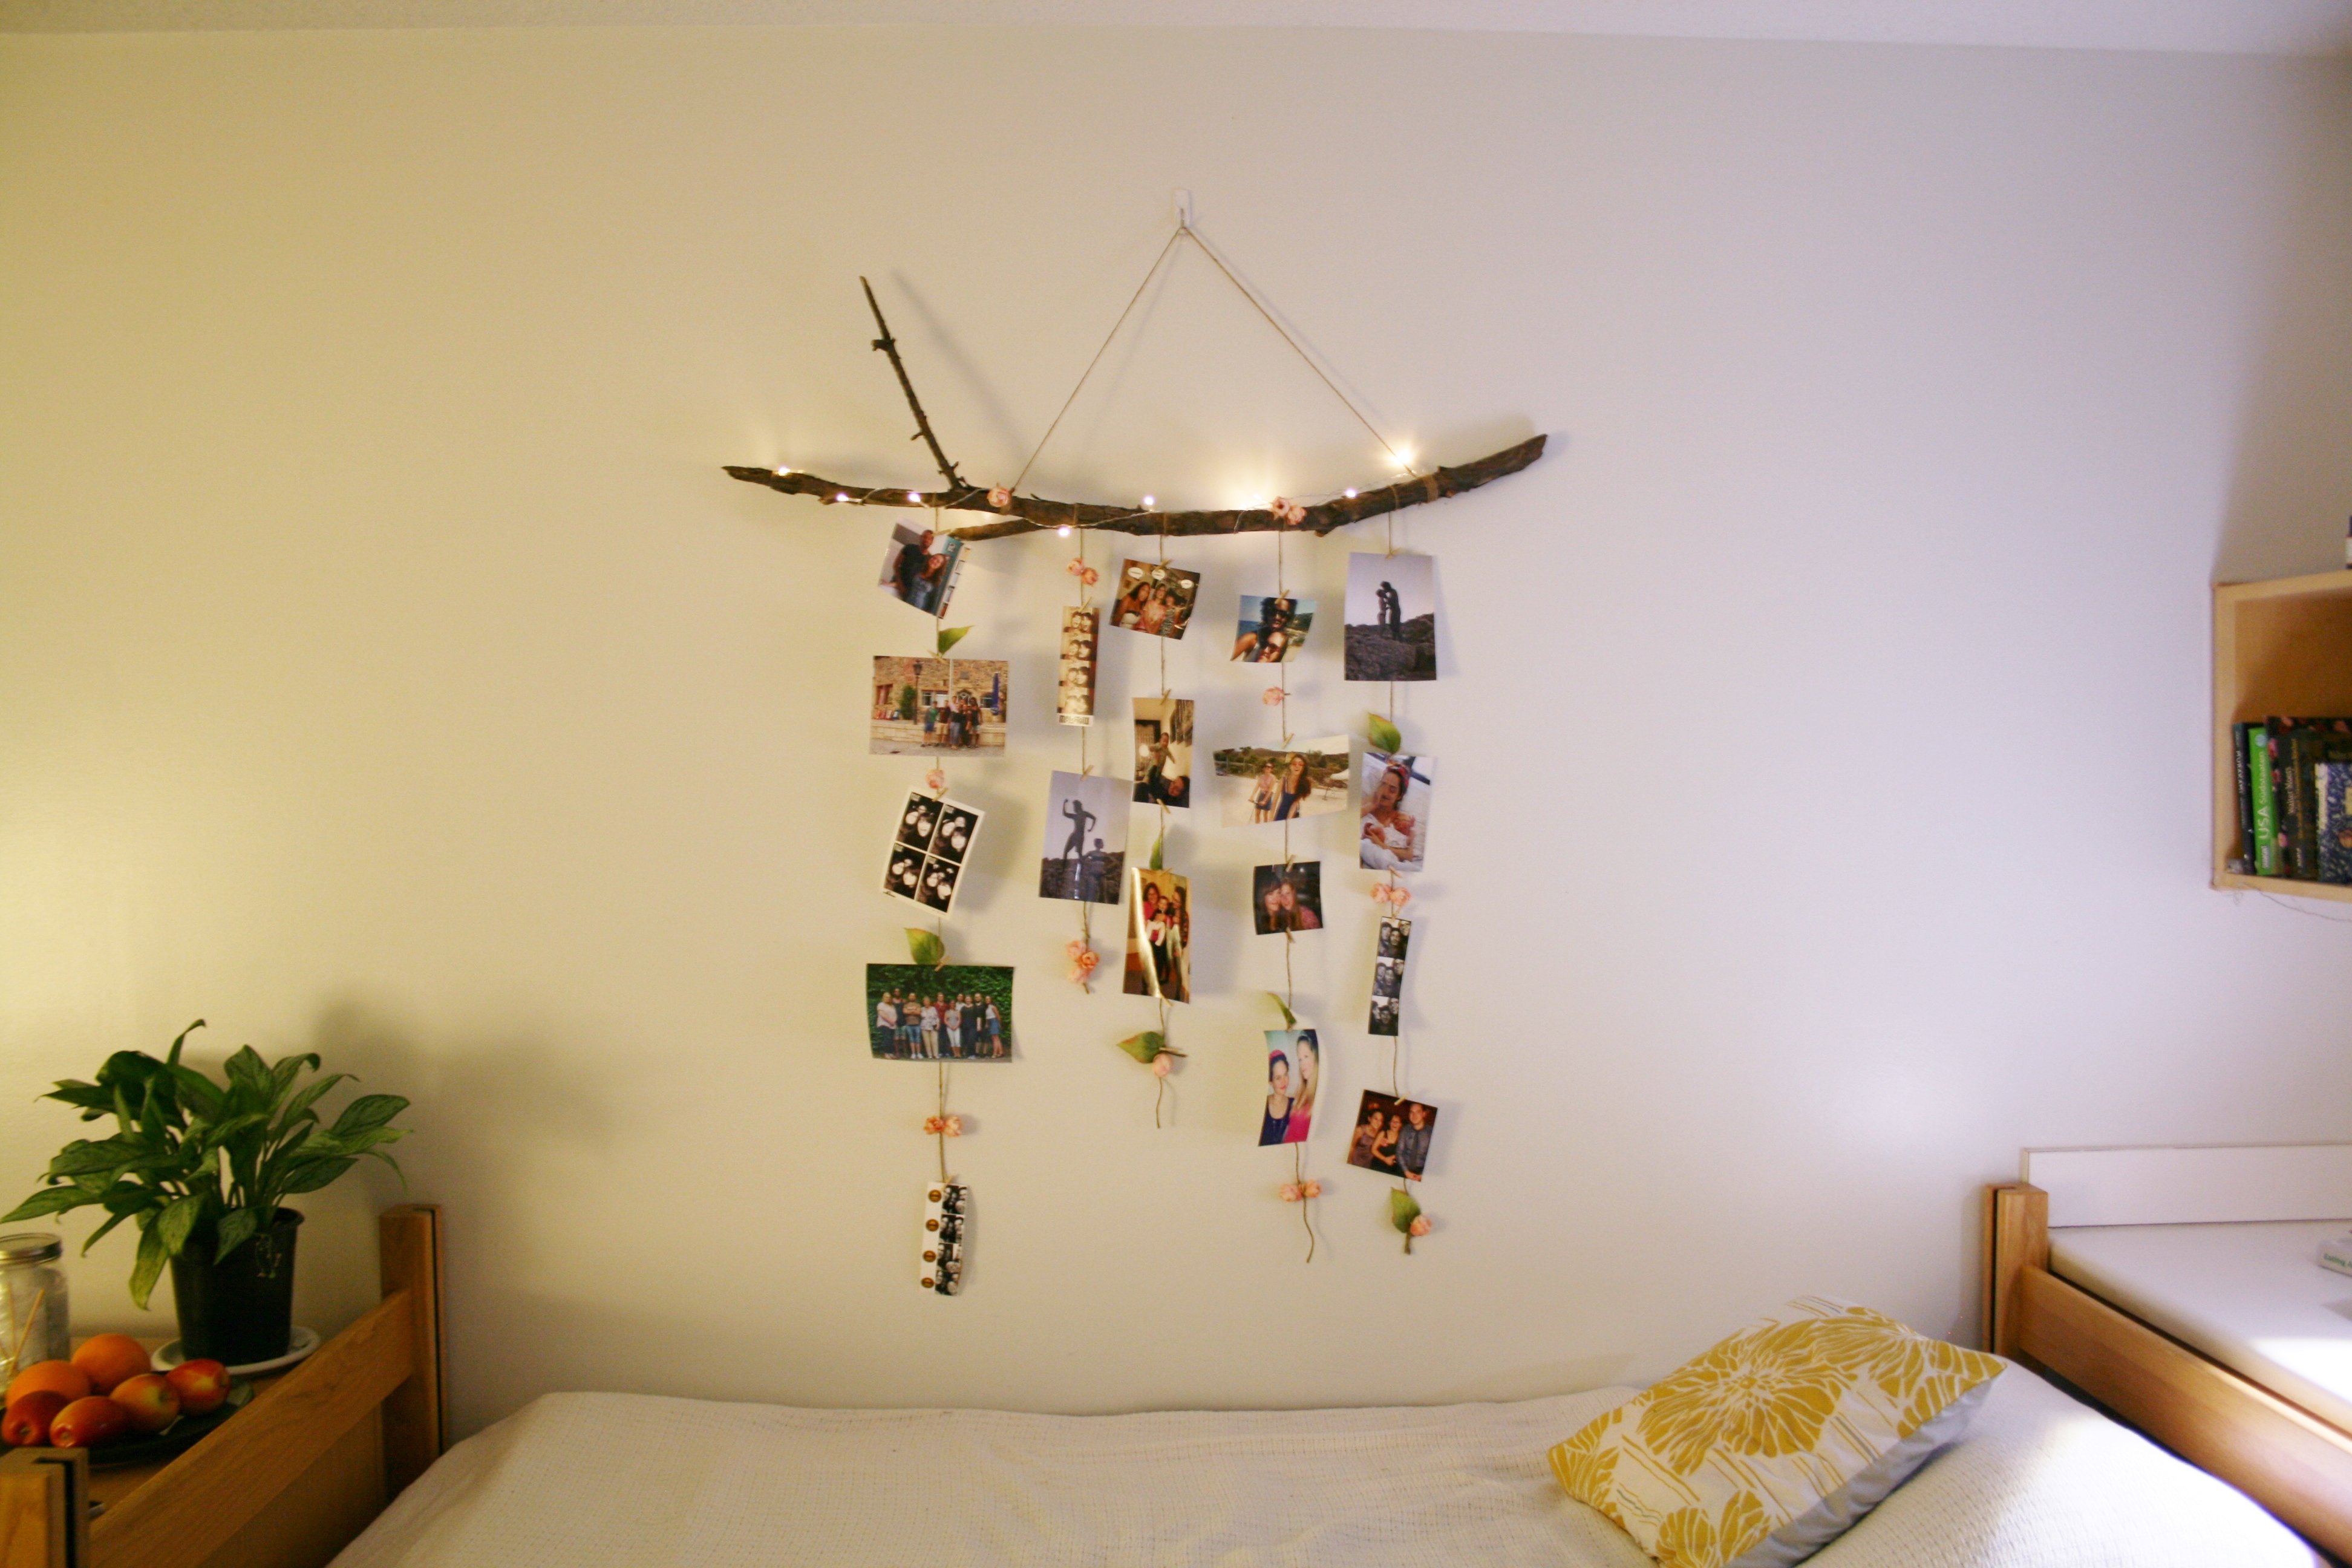
This post has been long in the making. Ever since I moved into my dorm room at UA back in August, I wanted to create some beautiful photo display to make my room more cozy and my walls a little bit more interesting. But since I had come over from Germany, I didn’t have any craft supplies with me. And, of course, I also don’t have a car in the US and the next craft store was miles away. #thestruggleisreal
Back in the fall, I found this beautiful tree branch somewhere on campus and just decided to take it with me (for some reason I was so embarassed about picking up this giant branch that I literally walked past it at first and only turned around to get it when I realized that no one was watching me, haha!). This past week, I finally made it to Michael’s and bought some supplies and yesterday I completed this project.
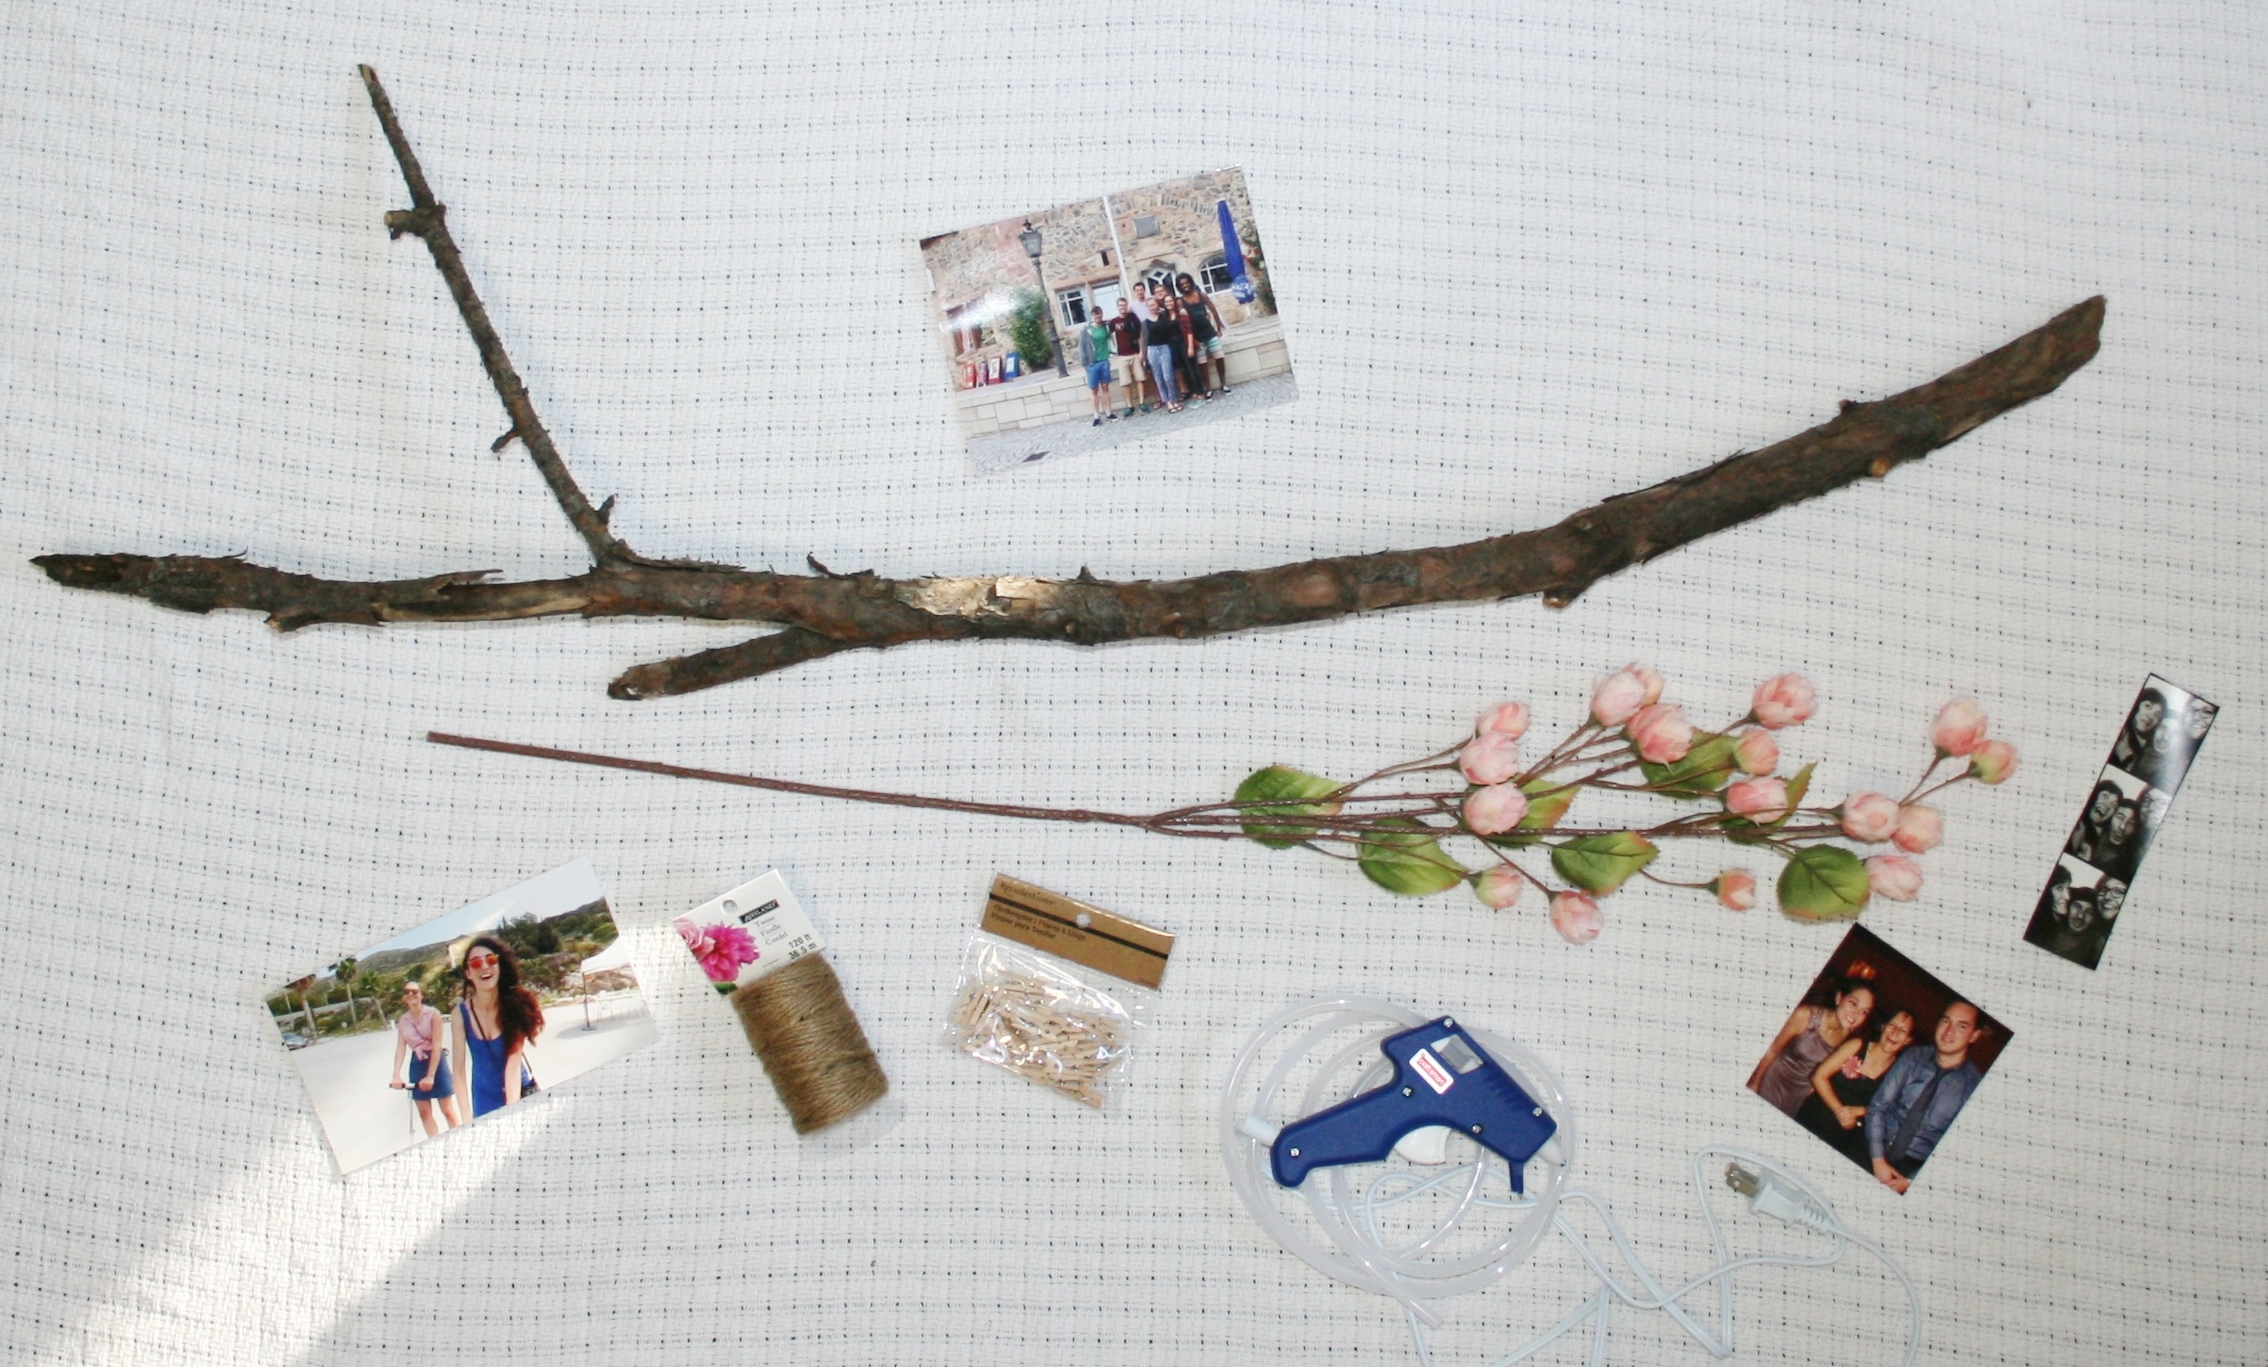
If you’re looking for a nice way to display your photos in your dorm room or any other space, give this a try! Here’s what you’ll need: a large tree branch, mini clothes pins, photos, a bunch of fake flowers (including some leaves), a hot glue gun, some twine, fairy lights (optional).
Step 1. Start by taking some twine and tie a knot around one end of the branch. As you can see, I did not attach the twine all the way at the end but more towards the middle of the branch. This allows for hanging it a little bit more sturdily. Make sure the knot is on the side of the branch that will be facing the wall. Then cut one end off and wrap the other end around the branch a few times, hiding the knot. Secure this with a little bit of hot glue. Measure out how long the twine needs to be, cut it, and tie the other end in place.
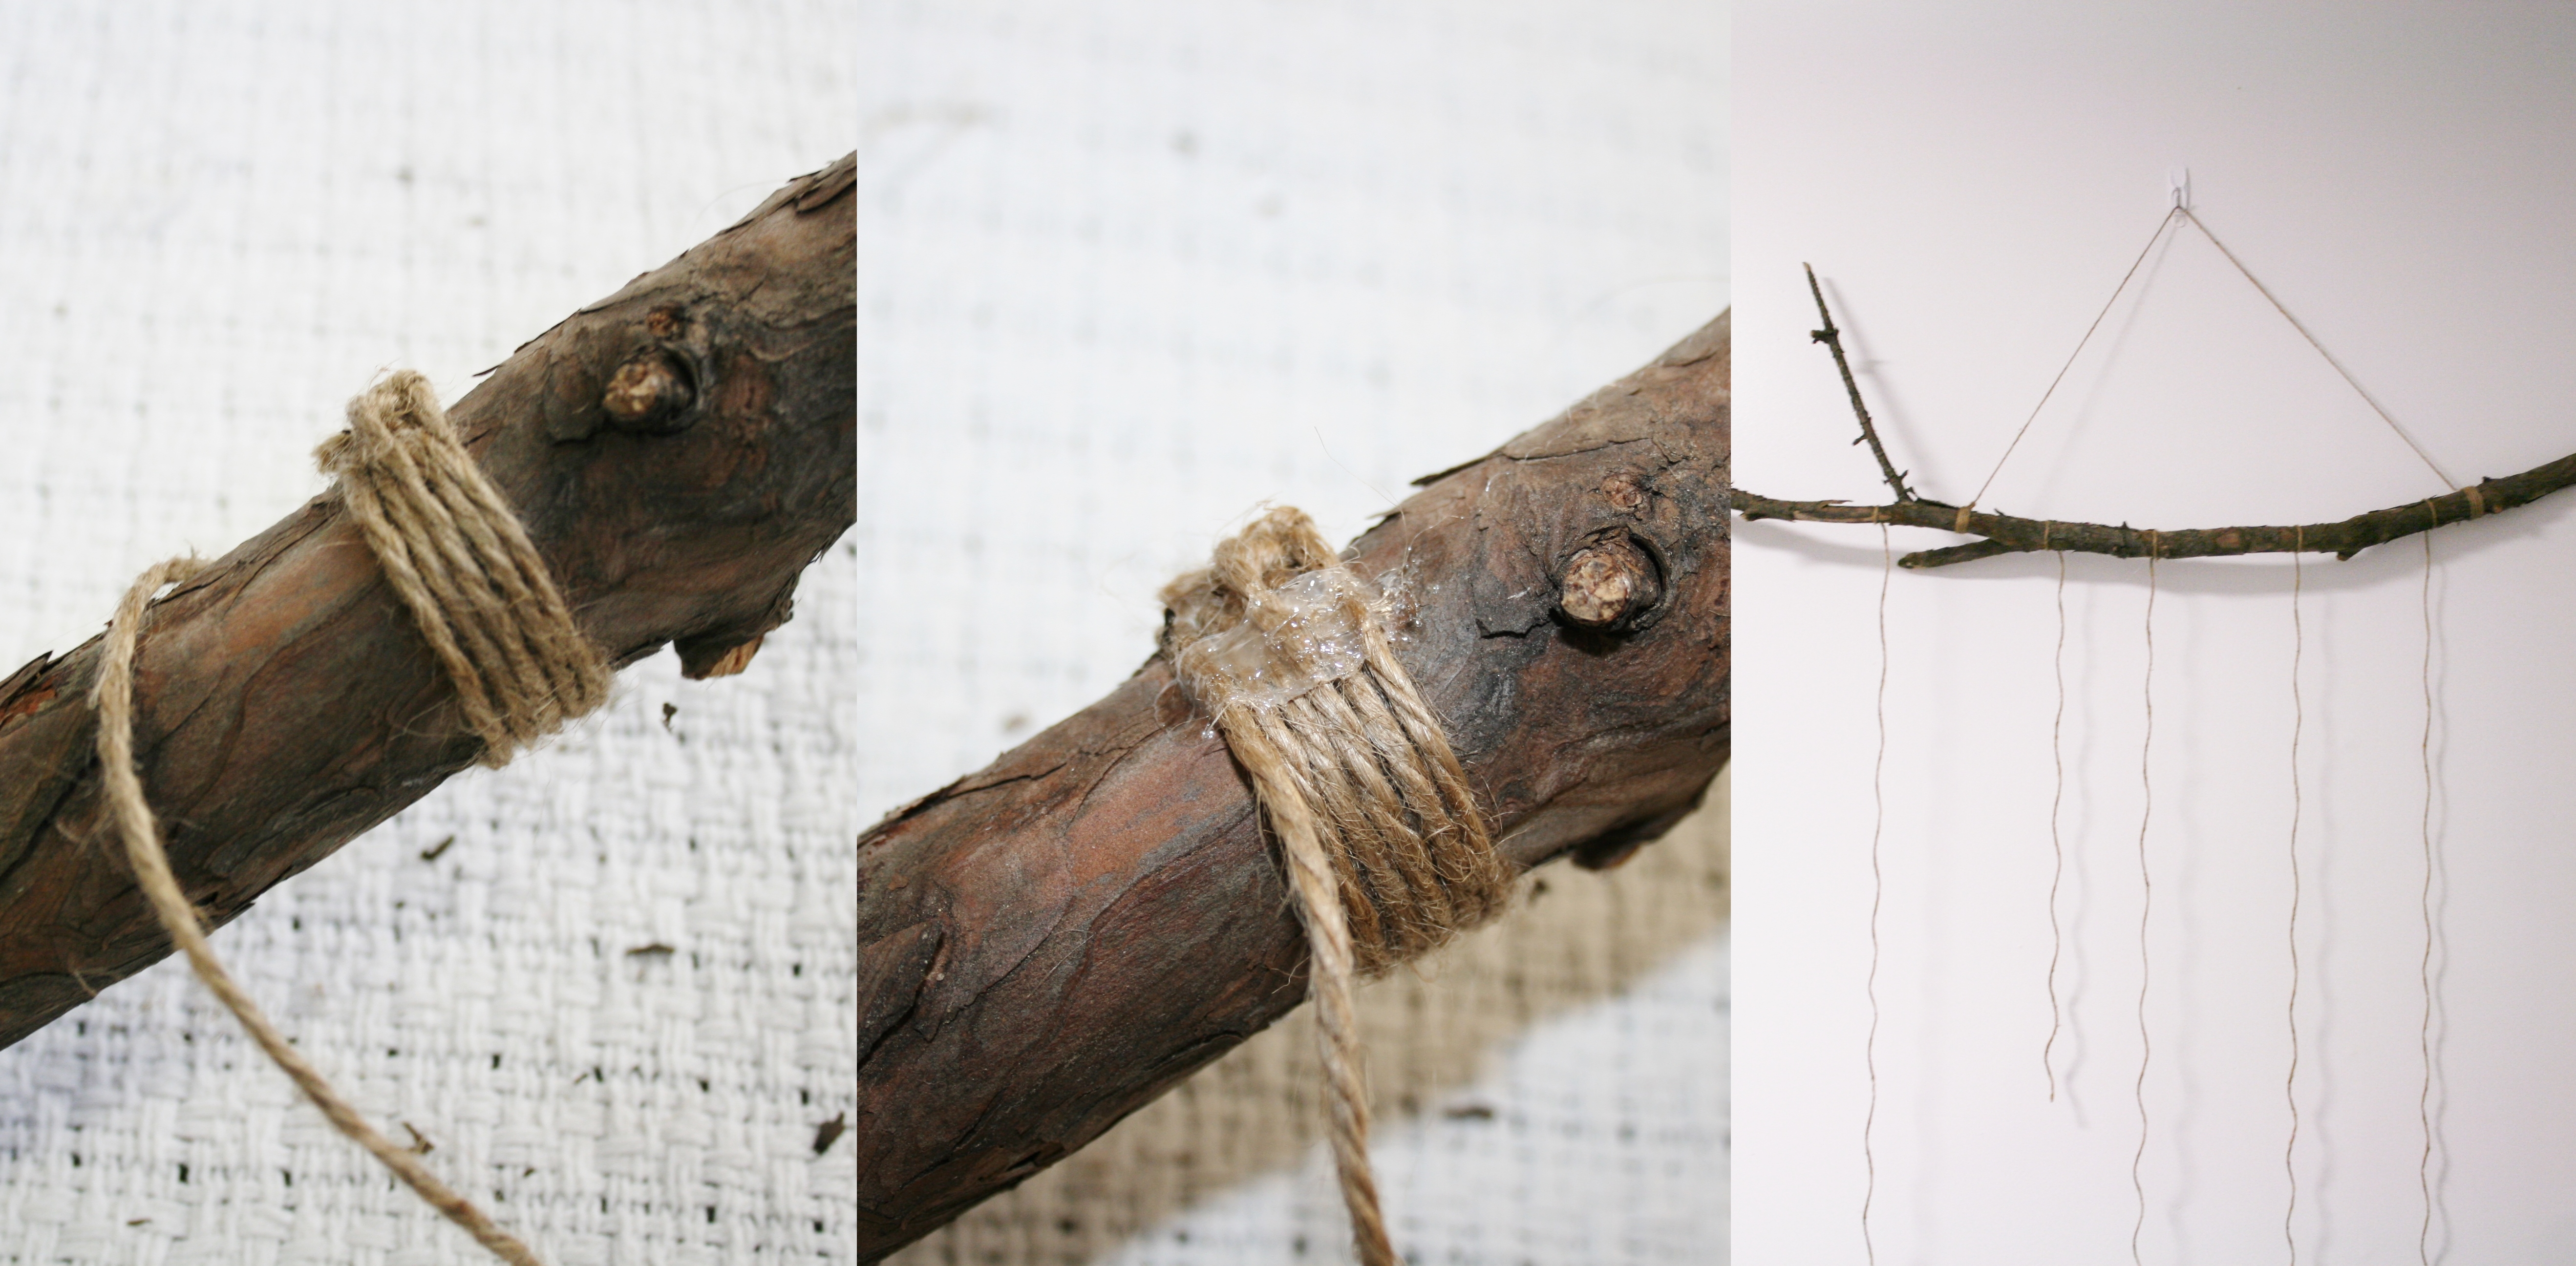
Step 2. Cut bits of twine at different lengths. Tie the ends to the branch at varying intervals, making sure the knot is in the back. Secure the knots in place using hot glue.
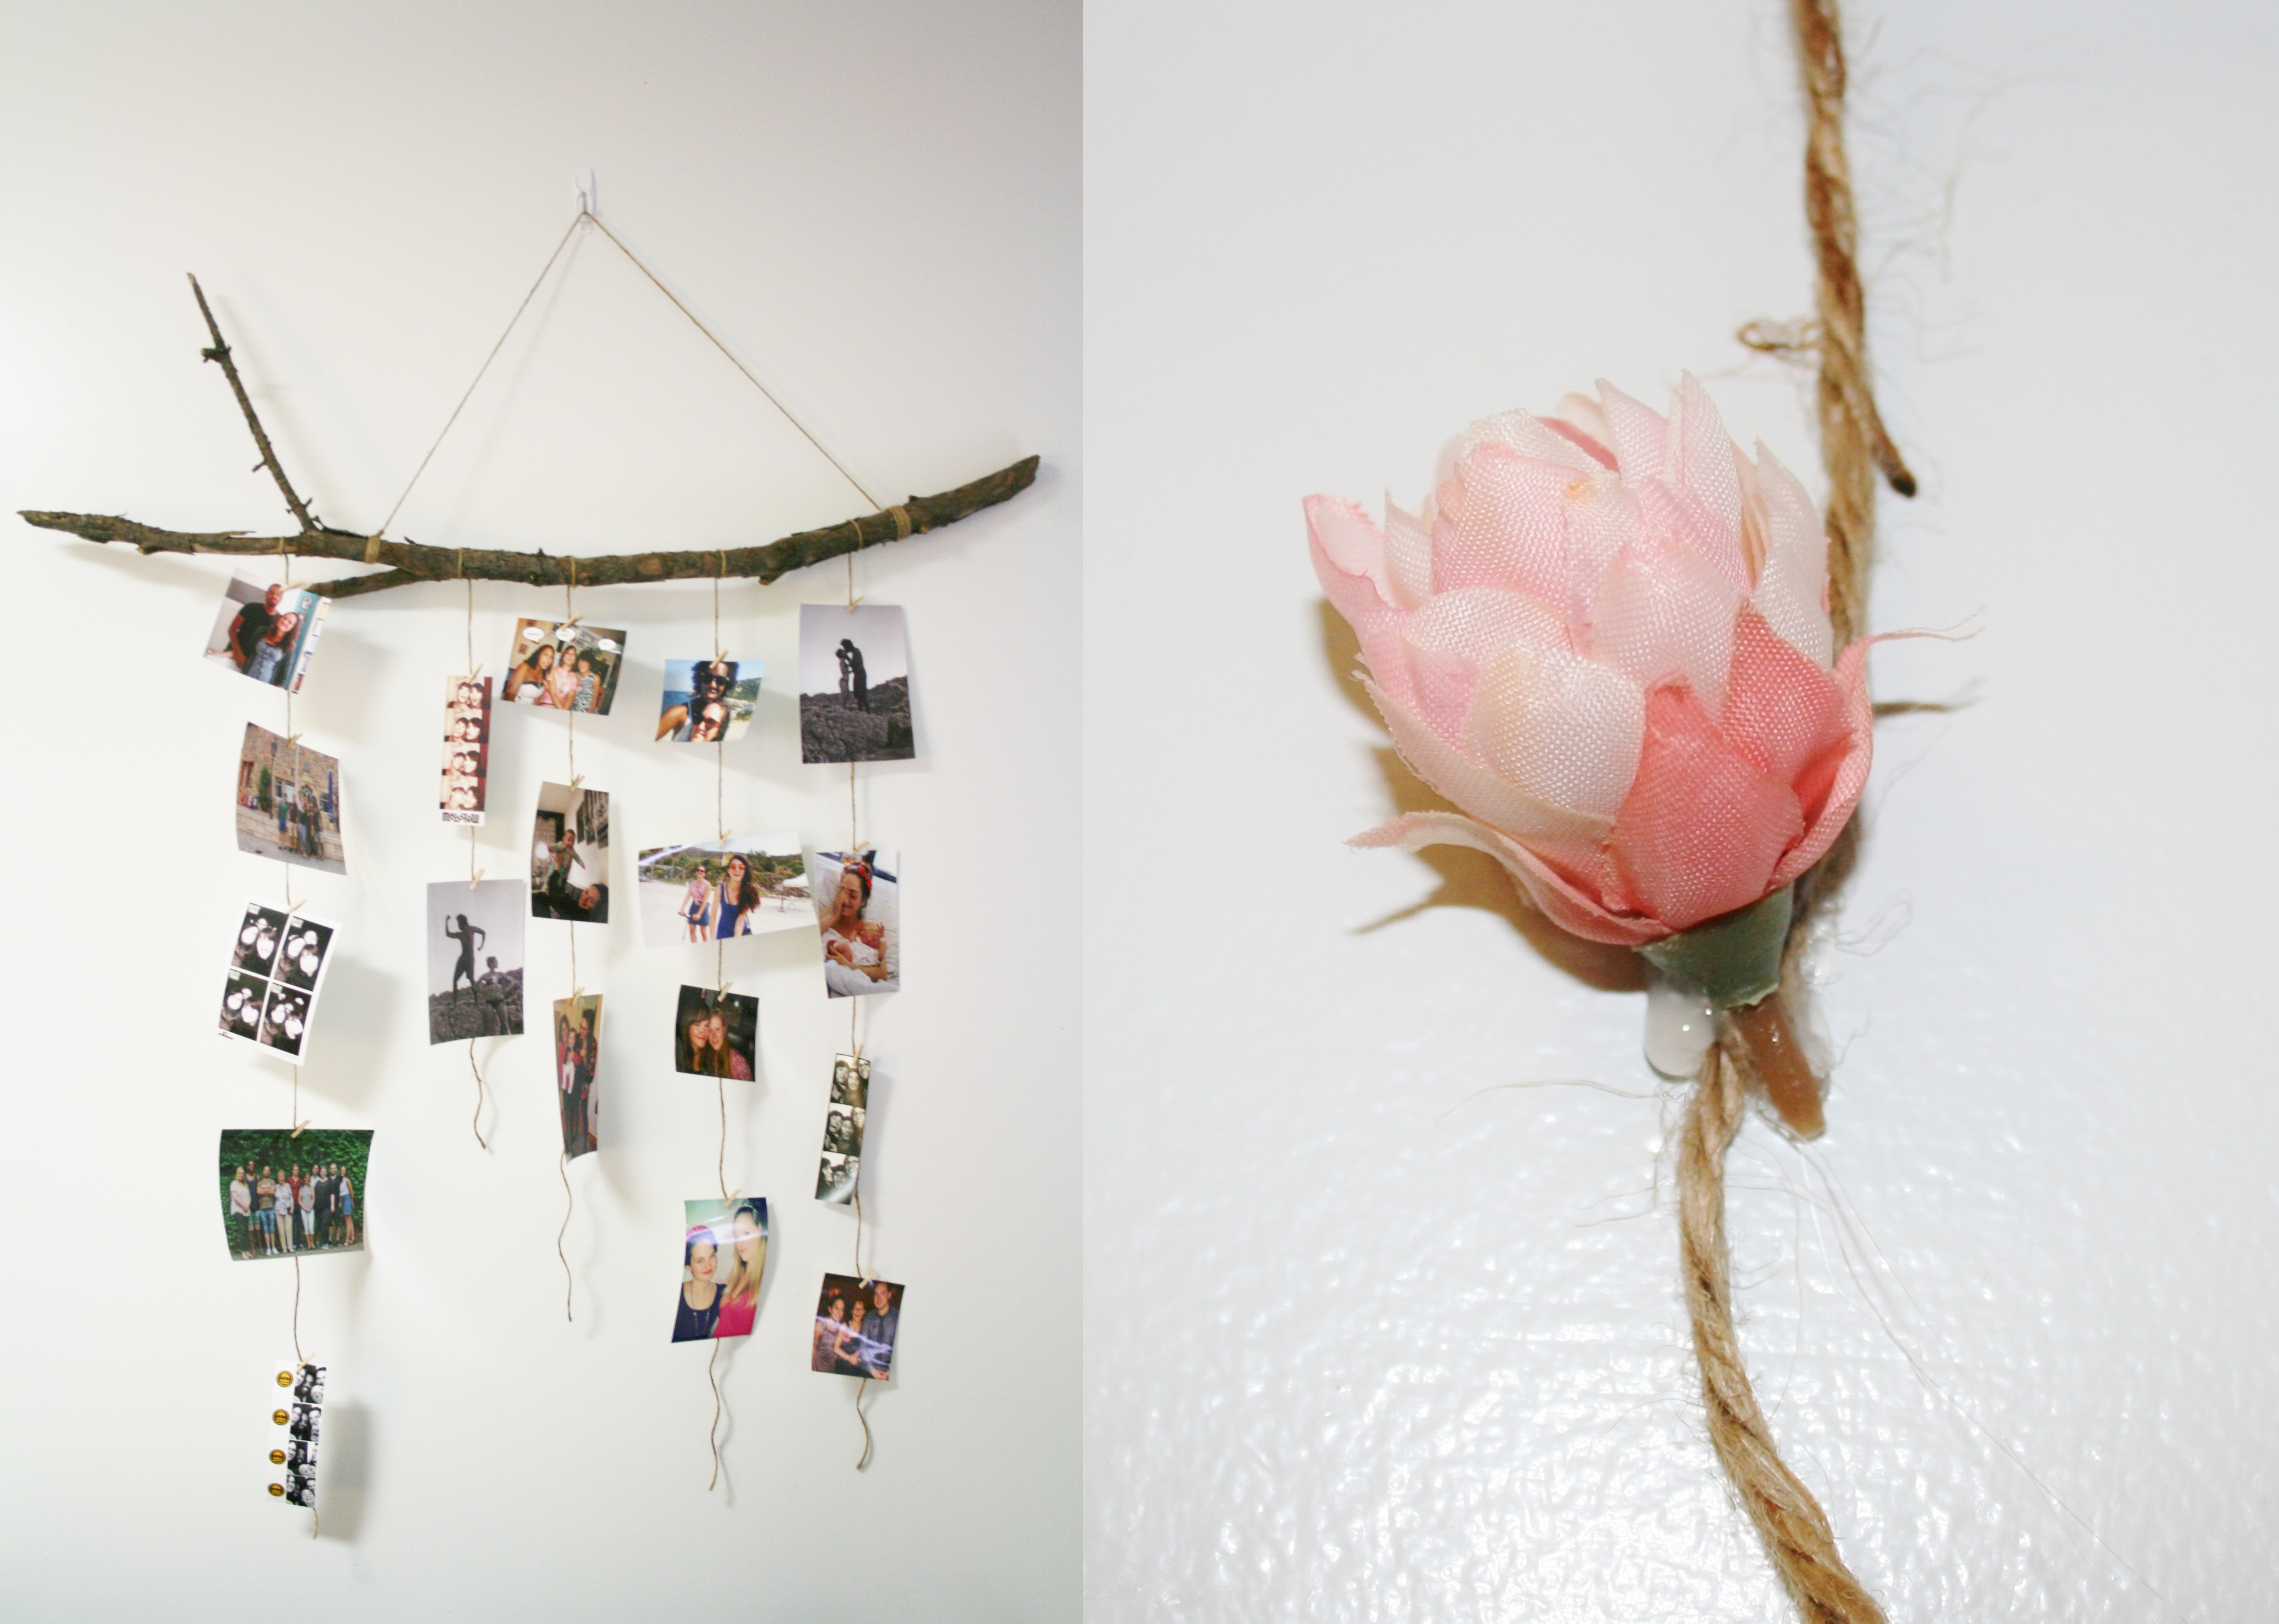
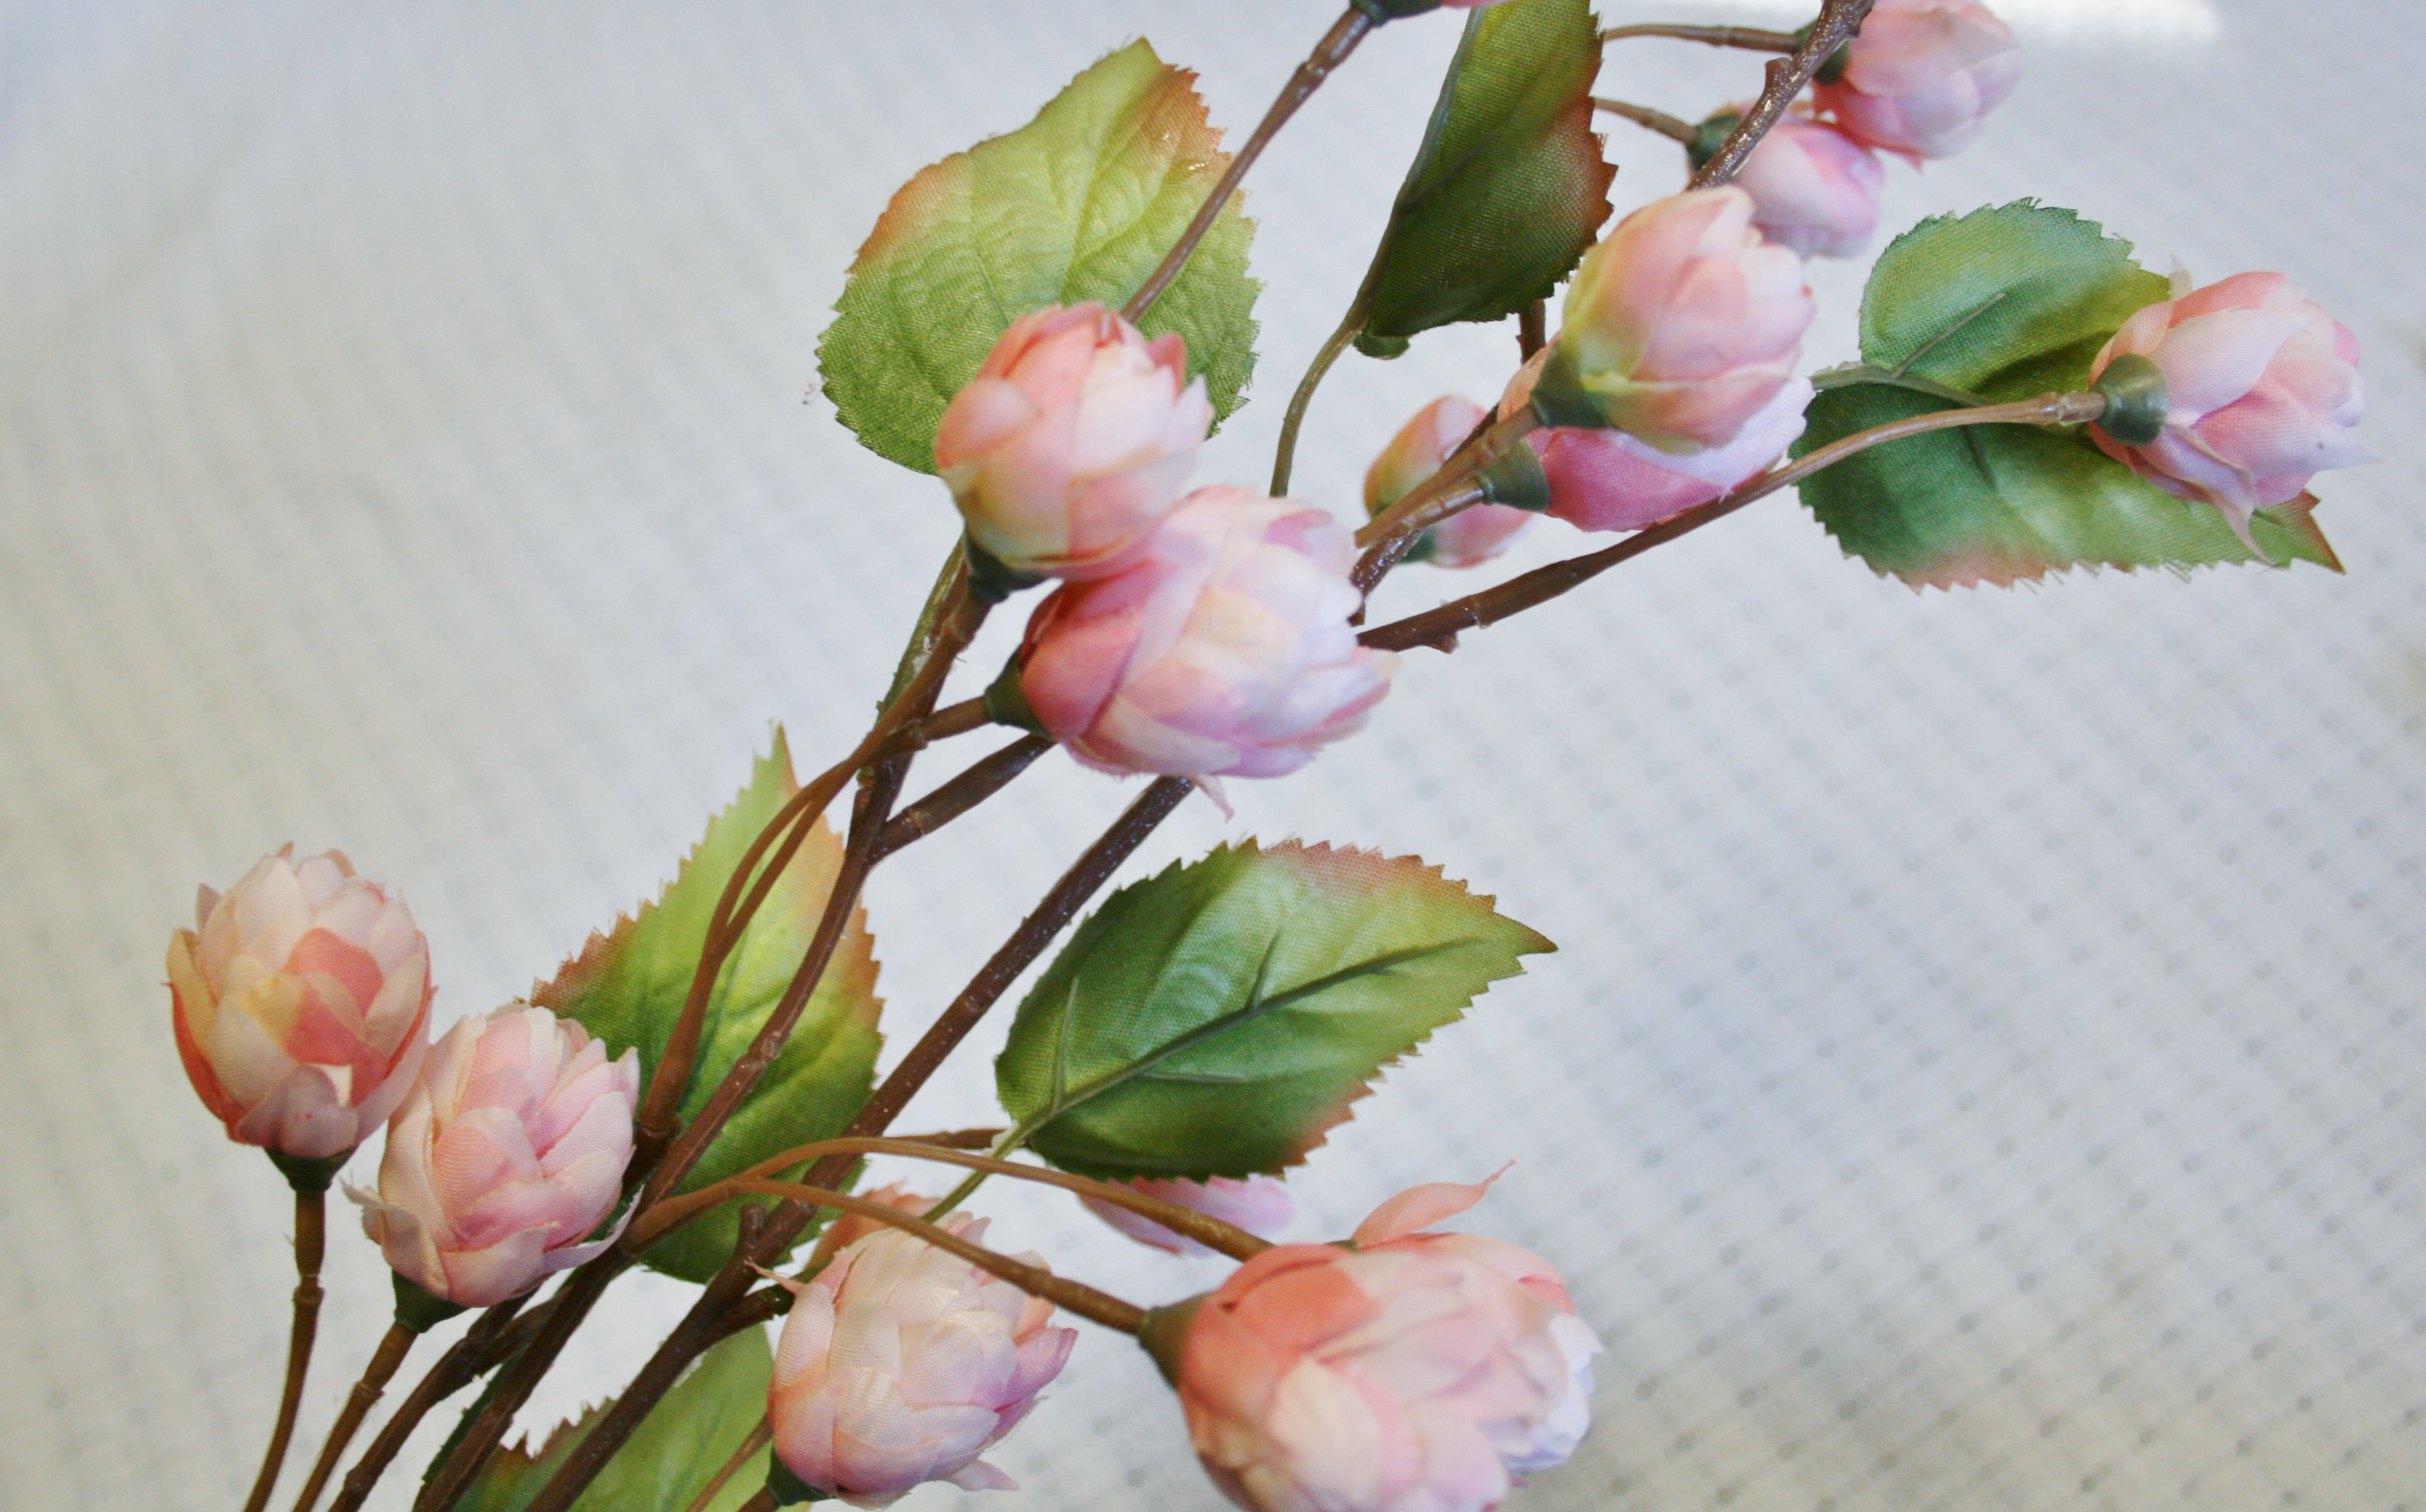
Step 3. Start attaching your photos to the twine with clothes pins. If you’re happy with the layout, attach the flowers to the twine between the photos. I also attached some to the branch itself. I also varied between one, two and three flowers in one spot.
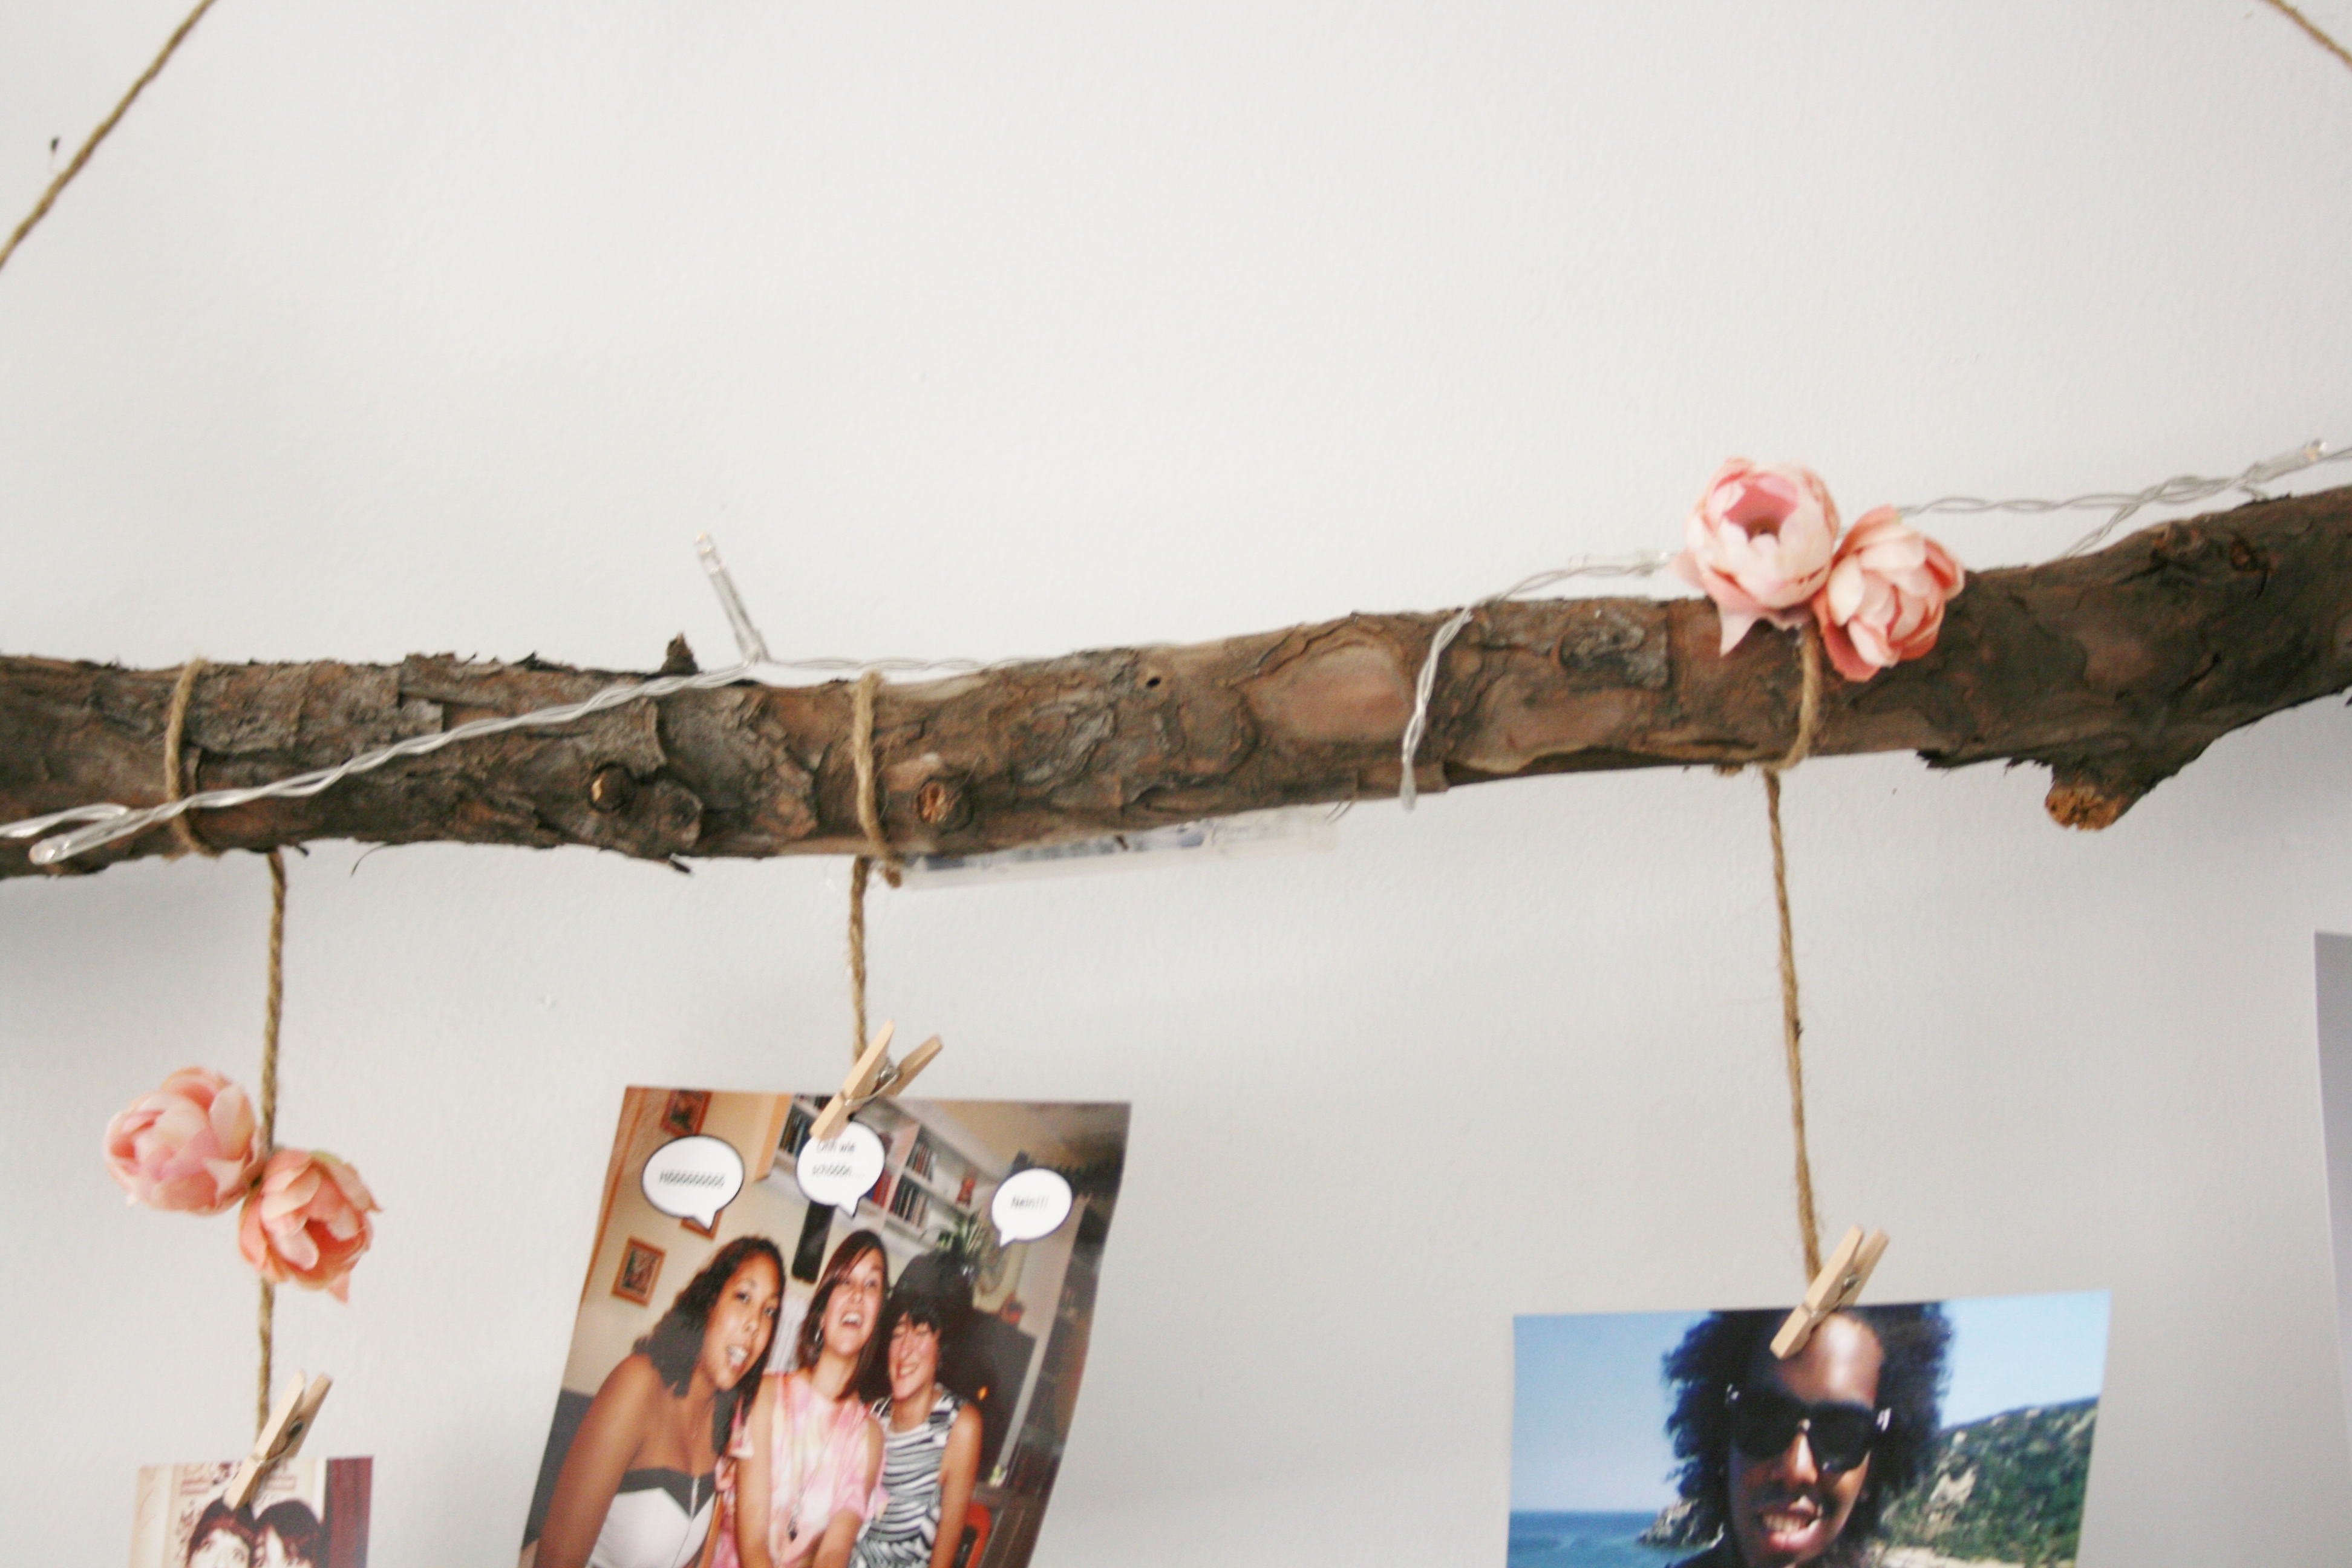

Step 4. Attach the leaves to the twine, either using the same clothes pin you used for a photo already, or using hot glue. Or you can do both or do it completely different than me… Just sayin’. Do what you want 🙂

Step 5 (optional). I decided to wrap some fairy lights around the branch to make the whole thing look just a little bit more magical 🙂 I attached the battery pack to the back of the branch using hot glue. You don’t have to attach fairy lights but I think it adds a nice touch.
A couple tips:
- I found it easiest to hang the branch on the wall before I would attach the photos. That way, I could easily see how it would look in the end.
- It can be tricky to get the photos facing forward. What I did was a) adjust the angle that I had used attaching the photos to the twine (i.e. rolling the twine between my fingers and reattach the pins) and b) glueing the ends of the twine directly to my wall, to straighten the twine a bit (I did this using flowers as well, so the glue is not visible beneath them). The wall in my dorm is very smooth and shiny, so I think it won’t be a problem getting the glue of the wall when I move out. Please check if your wall is appropriate for this before you do the same.
That’s it, nothing too fancy or difficult but I think it turned out pretty 🙂 If you recreate this, please tag me on Instagram (@lena.and.light), I would love to see your creations! I think this would be an awesome project to use only photos of the same format, like polaroids. Someone do this and show me, please!
Take care! xoxo